Showing posts with label winter. Show all posts

Tuesday, November 13, 2012

forest of handmade trees ~ part 2

A few days ago I showed you these three trees that I made. You can see that post here if you missed it.

Today I'm going to show you three more!

First, the ruffled fabric tree ~ I love this one. I've had this fabric for years {I made a quilt and way overestimated how much fabric I would need} so it was fun to dig it out and find another use for it. All I did was cut some strips and then folded them over to make ruffles as I wrapped them around the cone. I didn't measure how wide the strips are, but I would say about an inch. I left the raw edges because I think as it starts to fray it will add even more character. I just used pins to attach the fabric to the styrofoam.

I think it turned out so cute!

Next, the furry tree ~ I have mixed feelings about this one. It's made out of scraps from a blanket I cut up and I think it's cute, but I'm not sure if I love it. What do you think?

I added some beads for a little bling and I think that made a big difference. On its own it might not be the cutest one, but I do think it fits very well with the rest when they're all together.

This is where the scraps came from. I bought this blanket because it was the softest thing I have ever touched and it was on sale, but it really wasn't that warm when I got it home. So I cut it up and made pajama pants out of it! These are the most comfortable thing I have ever worn and I'm so in love with them. Definitely better than the blanket.
I didn't take pictures as I was making the pants, but if you want to see a good tutorial, here's one

And finally, the lace tree ~ I love this one too, and it took about 3 minutes to make. I just wrapped strips of lace around the cone and secured them on the back side with pins.

This picture is kind of blurry so it's hard to see the detail of the lace, but it's really pretty and I love the feminine touch it adds to my forest of rustic trees.

And here are all six of my trees together! This picture makes me so happy and I can't wait to see them all on my finished mantel!  

Linked to

Monday, November 12, 2012

forest of handmade trees ~ part 1

I've been working on some fun trees to add to my Christmas decor this year, and today I'm going to show you the first three I made. All of these are fast and easy, and they use supplies you probably already have in your craft stash!

First, the yarn tree. This one took all of 5 minutes to do. I had this chunky off-white yard left over from a previous crochet project and was happy to have another use for it. All I did was hot glue the end of the yarn to the tip of the tree and start winding. When I got to the bottom I put glue all around the bottom edge of the cone so the yarn wouldn't fall off. 

If you don't like the slouchy look it has you could use dots of glue here and there as you wind, but I kind of like it this way. I didn't mean for it to turn out slouchy, but I think it was a happy mistake :)


I used a hollow cardboard cone for this one and I thought if you wanted it to have a trunk you could use a candlestick turned upside down.

Very cute, and it would add some height if you need it.


Second, the fabric tree. For this one I cut two circles out of fabric and pinned them to the top and bottom of the cone (I used a styrofoam cone this time so it has a flat top and bottom that I wanted to cover). I used some leftover fabric from my Christmas card pinboard.  Next I cut 2 inch strips of the same fabric, folded them in half, and started wrapping from the top down. I just used pins at the beginning and end of each strip to attach it to the cone. I didn't really keep track of how long this one took, but I would say probably about 15 minutes.


And third, the twine tree. This one is similar to the yarn tree except I used a styrofoam cone so I needed to cover the flat top. I just started wrapping the twine in a spiral to make a flat little disk that I glued to the top of the cone. Then I just kept wrapping all the way down and used glue around the bottom of the cone to hold the twine in place. This one took about 10 minutes to make.

You can see a little bit better how I covered the top in this picture.

In about half an hour I had the beginning of my own little forest that I can't wait to see all put together with the rest of my rustic Christmas decor!

Check back soon to see the rest of the forest!

Linked to

Monday, September 24, 2012

broccoli cheese soup in a bread bowl

With temperatures cooling down I've been in the mood for soup, and the first recipe that came to mind was this one for broccoli cheese soup. I got it from my friend Sara a few years ago and I have no idea where she got it... so sorry, no source.


Ingredients
1/4 cup butter
1/2 onion, chopped
16 oz package frozen chopped broccoli, thawed
2 cans chicken broth
1 lb Velveeta, cubed
1 cup milk
1/2 tsp garlic powder
1/3 cup cornstarch
1/2 cup water

Directions
Melt butter in a big pot. Add onion and cook until softened. Stir in broccoli and cover with broth. Simmer until broccoli is tender, about 10-15 minutes. Reduce heat and stir in cheese cubes until melted. Add milk and garlic powder. In a small bowl, combine cornstarch and water and stir until cornstarch is completely dissolved. Pour into soup and stir constantly until thick.

This soup is creamy and delicious, and served in a bread bowl it is just heavenly. I think Velveeta is nasty stuff, but in this recipe it works and you don't get that gross fake cheese flavor. Enjoy!

Tuesday, December 27, 2011

*let it snow* shadow box

I hope everyone had a very merry Christmas. I'm enjoying some much needed time off!

This is a little winter craft I did last night that I think turned out pretty cute. I just cut some snowflake paper to fit the back of the shadow box, printed the words *let it snow*, and stuck it on with double sided tape. I filled the shadow box about 1/3 of the way with some fake snow, and glued a snowflake to the outside of the box. Simple, and a really cute addition to my winter decor!

I don't know how well you can see it in the pictures, but after I closed the back after putting the snow in I shook it around a little bit and pieces of the snow stuck to the glass and the paper in the back. It makes the whole thing sparkly!
  

Linked to

Friday, December 16, 2011

1 sweater, 3 crafts ~ glass block snowman

I'm excited to show you what I did with the last part of the sweater, but first a recap of the first 2 projects.

I started out with this sweater

First I made these leg warmers

and then this pillow

That left me with these scraps that don't look like they could be used for anything, right?

I turned those scraps and these supplies...

Into this!!
How cute is this little snowman? I can't look at him without smiling.

The glass blocks have an opening on one side, so the first thing I did was stuff the lights inside both blocks and glue them together using E-6000 with the smaller block upside down so the openings face each other.

You can see in this side view that the fronts and backs of the blocks are what's glued together and there's a space between them where the cord can come out.

Once the glue was dry and I had removed the stickers, I used the bigger stencil brush to blot some white paint all over the front of both blocks. When that was dry I used the bigger brush to make the buttons and the smaller one to make the eyes and mouth. For the carrot nose I just free-handed the shape in pencil and then went over it with orange paint.


For the hat I cut the top part of the sleeves of the sweater off. They were already rounded at the top where they met the shoulder seam, so all I had to do was follow the rounded edge as I sewed them together. I also cut some little strips to make a tassle at the top. I tied them together using a piece of thread and then just stuck it between the two sides of the hat and sewed over it. I used a plastic shopping bag to fill the hat and hot glued it to the glass block to keep it in place.

The scarf is just 2 strips cut right under the neck of the sweater and sewn together, then tied around the snowman's neck. One side of the sweater had more fabric left than the other so on the side with less I had to include part of the sweater's neckline, but I just put that part on the back side of the snowman so it doesn't show. The last thing I did was cut some slits in the ends of the scarf.  
This was such a fun little project and I couldn't be happier with how it turned out! He just might be my favorite winter decoration and I'm so glad I get to keep him out after Christmas!

Linked to

Entered in

Wednesday, December 14, 2011

1 sweater, 3 crafts ~ pillow

On Monday I showed you how I used the sleeves of a sweater to make these leg warmers. You can see that post here if you missed it.
That left me with this.

The next thing I did with the sweater was use most of the body to make this pillow.
I was able to keep the side seams intact and just pinned the sweater around a pillow form and then sewed the top and bottom shut. The sweater was a little bit bigger than the pillow, so in the back I cut it open and sewed it so the two sides overlap. I thought about sewing a button on, but it stays shut without one so I decided not to.

I also sewed some ribbon and a snowflake ornament to the front to make it look a little bit more wintery. Since I finished decorating for Christmas I have been working on a few things that will stay up through January, and I think this pillow is perfect for that.
With the pillow done I was left with this. I know it doesn't look like you could do much with these scraps, but check back Friday to see how I used them to make the cutest of the 3 projects!

Linked to

Monday, December 12, 2011

1 sweater, 3 crafts ~ leg warmers

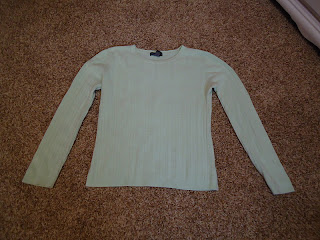
My mom gave me this sweater because it didn't fit her anymore, but it was big on me...so as any crafter would, I decided to cut it up and use it for some crafts! This week I will show you 3 different things I did with it so be sure to check back!

First and easiest ~ leg warmers! I'm loving the look of leg warmers under boots, so I just cut the sleeves off and hemmed the top. Here they are with a few different pairs of boots:


Cute!

That left me with this
Check back Wednesday to see how I used more of the sweater!

Linked to

Thursday, December 8, 2011

centerpiece update

I have been doing a lot of crafts lately, but I can't show them to you yet because they're Christmas gifts :)  So today's post is just a little update I made to my kitchen table centerpiece because I thought it needed a little something extra. I love the silver and white of the bells and the snowflakes, and even though my decorating style is fairly minimal, I felt like it was a little bit plain.

Before

I already had this fish bowl and had been trying to decide how I wanted to use it, so for now it has this cute little forest in it.
 
Just some fake snow and a package of bristle trees from Michaels (all 8 trees for $1.19 ~ not bad!). I think they're so cute!

I also bought a votive candle holder to glue to the bottom of the fish bowl to give it a base, but I dropped the bag on my way in and it broke :(  Good thing it was only $1.
I'm loving that this centerpiece is not Christmas specific so I can keep it out through January. I will change out the red after Christmas, but other than that it works all winter!