Tuesday, December 27, 2011

*let it snow* shadow box

I hope everyone had a very merry Christmas. I'm enjoying some much needed time off!

This is a little winter craft I did last night that I think turned out pretty cute. I just cut some snowflake paper to fit the back of the shadow box, printed the words *let it snow*, and stuck it on with double sided tape. I filled the shadow box about 1/3 of the way with some fake snow, and glued a snowflake to the outside of the box. Simple, and a really cute addition to my winter decor!

I don't know how well you can see it in the pictures, but after I closed the back after putting the snow in I shook it around a little bit and pieces of the snow stuck to the glass and the paper in the back. It makes the whole thing sparkly!
  

Linked to

Thursday, December 22, 2011

gift wrapping

I'm not quite finished wrapping yet, but here is a little taste of how I'm doing it this year
I wanted the wrapping paper to be simple so I chose a plain brown and dressed it up with some off-white yarn and those adorable medallions inspired by these at Design Dazzle

I just printed each person's name, cut them into circles, and glued them to circles of the same size cut out of index cards to make them a little bit sturdier. You could also just print them on cardstock and save the extra step. That font is Curlz.


The best part ~ besides how cute I think it looks ~ is that I already had everything I used! All I had to do was print the names and assemble everything. I enjoy wrapping gifts anyway, but this year it was fun to do something a little bit different than the usual printed paper and bows I've done most other years just because it's fast and easy. The medallions took a little bit of time to make, but other than that this really wasn't that much more time consuming and it looks so much cuter!

Linked to

Tuesday, December 20, 2011

Creative Blog Roll at The Girl Creative

The Girl Creative is a blog I have been following for awhile. Diane shares fun and creative ideas for crafts and home decor, she has lots of great guest posts, and every Monday she hosts a link party that I love to participate in. If you haven't had the chance to get to know her yet, take a few minutes to explore her blog.  You'll be glad you did!

Right now she is compiling a list of creative blogs on her Creative Blog Roll. What a great idea! There are so many fabulous blogs out there and this is a wonderful way to discover some new ones! Click on the button below and get ready to be inspired!

The Girl Creative

Friday, December 16, 2011

1 sweater, 3 crafts ~ glass block snowman

I'm excited to show you what I did with the last part of the sweater, but first a recap of the first 2 projects.

I started out with this sweater

First I made these leg warmers

and then this pillow

That left me with these scraps that don't look like they could be used for anything, right?

I turned those scraps and these supplies...

Into this!!
How cute is this little snowman? I can't look at him without smiling.

The glass blocks have an opening on one side, so the first thing I did was stuff the lights inside both blocks and glue them together using E-6000 with the smaller block upside down so the openings face each other.

You can see in this side view that the fronts and backs of the blocks are what's glued together and there's a space between them where the cord can come out.

Once the glue was dry and I had removed the stickers, I used the bigger stencil brush to blot some white paint all over the front of both blocks. When that was dry I used the bigger brush to make the buttons and the smaller one to make the eyes and mouth. For the carrot nose I just free-handed the shape in pencil and then went over it with orange paint.


For the hat I cut the top part of the sleeves of the sweater off. They were already rounded at the top where they met the shoulder seam, so all I had to do was follow the rounded edge as I sewed them together. I also cut some little strips to make a tassle at the top. I tied them together using a piece of thread and then just stuck it between the two sides of the hat and sewed over it. I used a plastic shopping bag to fill the hat and hot glued it to the glass block to keep it in place.

The scarf is just 2 strips cut right under the neck of the sweater and sewn together, then tied around the snowman's neck. One side of the sweater had more fabric left than the other so on the side with less I had to include part of the sweater's neckline, but I just put that part on the back side of the snowman so it doesn't show. The last thing I did was cut some slits in the ends of the scarf.  
This was such a fun little project and I couldn't be happier with how it turned out! He just might be my favorite winter decoration and I'm so glad I get to keep him out after Christmas!

Linked to

Entered in

Wednesday, December 14, 2011

1 sweater, 3 crafts ~ pillow

On Monday I showed you how I used the sleeves of a sweater to make these leg warmers. You can see that post here if you missed it.
That left me with this.

The next thing I did with the sweater was use most of the body to make this pillow.
I was able to keep the side seams intact and just pinned the sweater around a pillow form and then sewed the top and bottom shut. The sweater was a little bit bigger than the pillow, so in the back I cut it open and sewed it so the two sides overlap. I thought about sewing a button on, but it stays shut without one so I decided not to.

I also sewed some ribbon and a snowflake ornament to the front to make it look a little bit more wintery. Since I finished decorating for Christmas I have been working on a few things that will stay up through January, and I think this pillow is perfect for that.
With the pillow done I was left with this. I know it doesn't look like you could do much with these scraps, but check back Friday to see how I used them to make the cutest of the 3 projects!

Linked to

Monday, December 12, 2011

1 sweater, 3 crafts ~ leg warmers

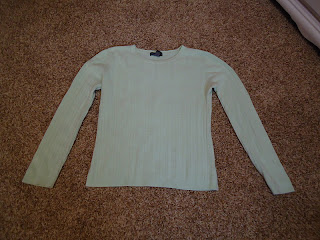
My mom gave me this sweater because it didn't fit her anymore, but it was big on me...so as any crafter would, I decided to cut it up and use it for some crafts! This week I will show you 3 different things I did with it so be sure to check back!

First and easiest ~ leg warmers! I'm loving the look of leg warmers under boots, so I just cut the sleeves off and hemmed the top. Here they are with a few different pairs of boots:


Cute!

That left me with this
Check back Wednesday to see how I used more of the sweater!

Linked to

Thursday, December 8, 2011

centerpiece update

I have been doing a lot of crafts lately, but I can't show them to you yet because they're Christmas gifts :)  So today's post is just a little update I made to my kitchen table centerpiece because I thought it needed a little something extra. I love the silver and white of the bells and the snowflakes, and even though my decorating style is fairly minimal, I felt like it was a little bit plain.

Before

I already had this fish bowl and had been trying to decide how I wanted to use it, so for now it has this cute little forest in it.
 
Just some fake snow and a package of bristle trees from Michaels (all 8 trees for $1.19 ~ not bad!). I think they're so cute!

I also bought a votive candle holder to glue to the bottom of the fish bowl to give it a base, but I dropped the bag on my way in and it broke :(  Good thing it was only $1.
I'm loving that this centerpiece is not Christmas specific so I can keep it out through January. I will change out the red after Christmas, but other than that it works all winter!

Monday, December 5, 2011

around the world in 12 hours

Saying I love to travel might be a bit of an understatement. I really love it. I love seeing other countries and being able to experience ~ even if it's only for a few days ~ the way other people live. Food, culture, accents...it's all fascinating to me. I created this clock as a way of having some of my pictures out on display instead of just in a scrapbook stuffed away in a closet, and it's one of my favorite things in my house!

The clock came with some vinyl numbers that are supposed to stick on the wall, but instead of using them I bought 12 frames and put pictures in them that I have taken around the world (I used 2 of the numbers for this project if you want to see what they look like). It's hard to tell with no frame of reference in this picture, but the clock is about 4 feet across.

Here's a close-up of each frame so you can see some of the places I've been. Sorry the pictures are a little dark. I always seem to remember to take pictures at night.

Big Ben, London

Tulum, Cancun

Yu Garden, Shanghai

a Maui sunset (do you see a face in the water, or is it just me?)

Tower Bridge, London

Prague Castle, Prague

Eiffel Tower, Paris

Temple of Heaven, Beijing

Colosseum, Rome

our resort in Cancun

Karlstejn Castle, a little bit outside of Prague

Grand Canal, Venice

This idea has some versatility too. You could do something similar in your child's room with a picture from each month of their first year... scrapbook paper instead of photos... different frames instead of 12 of the same one like I did... there are lots of different options!

Linked to

Entered in