Monday, January 30, 2012

3 tiered serving tray

Do you see where I'm going with this?
I found these melamine dishes at Target and fell instantly in love with them. The dinner plate was $1.99 and the salad plate and bowl were each $1.79. Add in a couple of candlesticks and you get a cute and versatile 3 tiered serving tray for less than $10!

I love having a bowl on the top instead of a third plate because I think it gives me even more possibilities. Think salsa with chips on the plates, dip or a cheese ball with vegetables or crackers, candies in the bowl and cookies on the plates...there are so many different things you can do!

I thought about spray painting the candlesticks white but I'm glad I didn't because I like that you can see the whole pattern on the plates. They're too cute to cover up any part of them!

Perfect for game day treats this weekend!

Linked to

Tuesday, January 17, 2012

RANT and RAVE with Randee's Organized Chaos

Randee's Organized Chaos is a blog I started following when she was counting down to Christmas with a daily post about holiday treats, gift ideas, decor, etc. Since then she has continued to post something new each day which is amazing!

Randee is hosting a fun party right now where you can link your blog to hers and then receive anonymous critiques! Other bloggers will look at your blog and write what they like, what they don't like, and any advice they would give to make your blog better. You will also have the chance to provide your feedback to 2 other blogs. What a great idea!

If you're interested in participating, click the button below!


My blog is pretty new and I know there are lots of things I can do to improve, so I can't wait to see what helpful feedback I get!

Valentine's Day mantel

After Christmas it felt so good to put everything away and not have so much clutter everywhere, so for Valentine's Day I decided to go pretty simple on the decor. Other than my mantel the only thing I really have out is a candy dish and I'm loving the simplicity.

I loved this felt leaf garland I made for my fall mantel, so I decided to do something similar for Valentine's Day.
I cut out a bunch of hearts in different sizes and shades of pink and strung them together using pink yarn. Once it was done though, I decided it looked cuter along the front of the mantel than if it was hanging down like a garland.

I've got the Great Purge of 2012 going on at my house right now, and as I was going through some boxes I found this adorable picture that I bought in high school when I worked at Hallmark. How perfect for Valentine's Day decor!

As you can see here and here, I love making things out of buttons. Sorry it's a little blurry, but I found this paper at JoAnn that says *I love you* all over it. Perfect.
First I printed *all you need is love* on the paper. It was 12x12 so I had to cut it down to 8.5x11 so it would go through the printer, then again to 8x10 to fit in the frame. Then I just glued buttons on to make the heart. I love it!
And...the song will now be stuck in your head all day too :)


Linked to

Thursday, January 12, 2012

the evolution of my spare bedroom, part 1

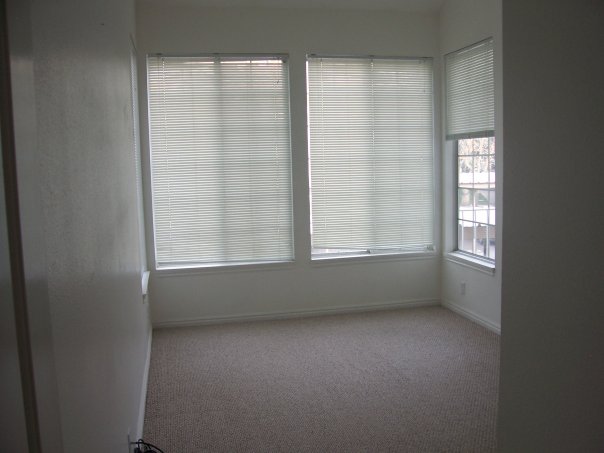
This is how my spare bedroom looked when I bought my house ~ a blank canvas. I put in new carpet throughout the house but other than that this room sat untouched for awhile. 
I knew I wanted to do something with it to make it a useful room and not just storage space, but what? For awhile the plan was to turn it into an office, because that's what you do with extra bedrooms. Right? I looked online and in magazines and compiled a bunch of ideas for the look I was going for, but I could never find the right desk or desk chair. Since those are kind of important in an office, the room continued to sit untouched.

Then one day, an idea struck. A travel room! I love to travel and have been to 7 other countries (so far). Everywhere I go I buy a frame and other decorative things and I wanted a place to display them. I decided to make the room more of a library than an office because I knew I would never actually sit at a desk even if I found the right one. And doesn't library sound so much better than office?

So I did this:
I LOVE this chaise lounge and it was really where the library idea came from. 

It took awhile to find the right ones, but I finally added these curtains to replace the awful broken blinds.

Look how perfect the colors are. The blue/grey color matches the wall color, the dark brown matches the chaise, and the 2 shades of beige go with the carpet. And I love how they soften that whole end of the room.

But there were still 2 big problems with this room:

1. I still didn't use it. I had put a bunch of stuff in it and turned it into a shrine to my travels, but it didn't serve any real purpose.

2. I do not like the wall color. I was going for grey with a hint of blue in it, and what I got looks like it should be a baby boy's nursery. But I don't like to paint so the blue has stayed.

I decided to separate this post into 2 parts so you wouldn't have to stop for food and water half way through. Check back soon for part 2 where I will show you a few things in more detail, plus some recent changes I have made!

Monday, January 9, 2012

chevron pattern crocheted blanket

This is a blanket I made for my sister for Christmas. I love to crochet and had done lots of blankets, scarves, and hats before but this one was new for me because I had never done a chevron pattern. I watched this video on YouTube and I was off! It took a few rows to really get used to it but after that it was really pretty easy and I LOVE how it turned out. So much that I might have to do one I can keep for myself.

Here's a close up so you can see the colors and the stitches a little bit better. It's just double crochets, and the yarn colors are Red Hart soft white, Red Hart coffee, Vanna's Choice charcoal grey, and Vanna's Choice silver heather.

And while we're talking about crocheting, here are a few other things I've done. I've made several different hat patterns but this one is by far my favorite. (It's a free Lion Brand pattern and you can find it here if you're interested.) Sorry it's kind of hard to see the details in the picture. This is me in China a few months ago and the picture was of the building behind me, not the hat :)

This is the same pattern, but on this one I put a bow instead of a flower. Obviously it's on the other side of my head and you can't see it in this picture. What you can see is the nasty fish head I was pretending to eat (this is also in China)

Same one but in this shot you can also see the matching scarf I made to go with the hat (still China)

And please ignore the awful lighting in this one. My friend and I look horrible, but look! It's the hat again in purple. And yes, that's still China. I wore a lot of hats in China :)
These next 3 pictures are just some close ups of some other hat styles I've done and some flowers.


You might say I'm hooked on crochet :)

Linked to

Thursday, January 5, 2012

button monograms

I wasn't going to do a top 10 or best of post since I just started my blog in October, but I just looked at my stats and there are 3 projects I've done that have gotten so much attention that I decided to highlight them again. Based on page views, here are your favorites of 2011:


Thanks for all of your sweet comments on these!


Now on to the button monograms. I made these for Christmas gifts and they were fun and easy, but most importantly they were very well received!

I made this one for my mom. The M is for our last name, but I guess it could be for mom too :)

A close up of some of the buttons and the pretty paper. Since the frame is fairly simple, I decided to use a variety of different buttons and ended up going with a metallic sort of look.

This one was for a friend whose first and last names start with A

Since this frame is more ornate, I decided to go with simpler buttons. You can see here that I stacked some of them to add a little bit of texture.


A frame, a piece of scrapbook paper, some buttons, and hot glue are all you need to make a personalized gift that anyone would love!

Linked to